Hotkeys
| Key | Function |
|---|---|
| ⌘, | Settings |
| ⌘1 | New client |
| ⌘2 | New product |
| ⌘3 | New document |
| ⌘4 | New to-do |
| ⌘S | Save |
| ⌘N | New |
| ⌘E | Edit |
| ⌘D | Duplicate |
| ⌦ | Delete |
| ⌘P | |
| ⌘R | Preview |
Toolbar

The "Toolbar" appearing at the top of tha program can be customized by your needs from the main window or
documents. Right-clicking on the top menus will show the setting options. You can choose how menupoints
appear: icon+text, only icon, only text, or even hide entire toolbar. You can also choose icons to appear
in small size.
If you would like to change the top menus' content or order, choose "View/Customize toolbar...". An edit
surface will appear, where you can simply drag in the menupoints in the order you would like them to appear.
Views

You can change between views from the menus' "View" menu or by pressing the according buttons of toolbar.
You can choose from four main views:
- Browser view
- Calendar view
- Report view
- Design editor
Browser view
Screen will appear divided into three main parts. Left side will show grouping by type. Middle column holds the list according to the selected type. In the right, there can be seen the detailed data of the certain selected elements.
Detailed description on using this view can be found in chapter "Browser view".
Jump to chapter →
Calendar view
Here you can look through your to-dos. Changing view between monthly, weekly or daily can be done in the right column. If you check in box "Show documents", your made out documents will also be shown beside your to-dos. This is also true on checking in box "Show completed to-dos". Clicking on an event will show it's detailed description in the column on the right.
Description of adding and maintenancing to-do's can be found in chapter "Calendar view".
Jump to chapter →
Report view
Filtering conditions of the statement you wish to view can be set in the column on the right. In tab "Statement options" various parameters can be set, while in tab "Columns", there can be set that which columns are desired to appear in the statement.
Description of making statements can be found in chapter "Report view".
Jump to chapter →
Design editor
With the help of menu "Design editor", an entirey unique, uniform design can be made according to the image of the company. Looks of every element appearing on the document can be edited and customized with the help of the simple and easy-to-learn editing surface.
Description of the maintenance of documentimage editor can be found in chapter "Design editor".
Jump to chapter →
Intelligent functions

The essence of intelligent functions is that the maintenance can be made by either the same hotkey or the same button from toolbar. It will be shown on toolbar that currently wich element is selected.
- New ⌘N
- Edit ⌘E
- Duplicate ⌘D
- Delete ⌦
For example, if in Browser view a client is selected, then there is no need to search for specially
client edit, only simply use hotkey ⌘E.
If anything else is selected (product, document or to-do), it can also be developed for editing
with hotkey ⌘E.
The situation is the same with master data, for example, adding new lines will be
⌘N everywhere; and what is more, new item lines can also be added
the same way while making a document. Design editor can be used in "intelligent functions" too.
Putting in practice - First tasks
Tasks after installing:
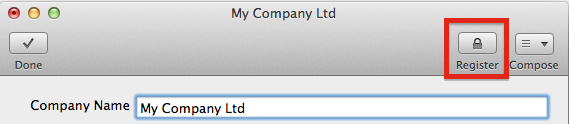
- Choose menu "Settings/My company", fill in your company data and registrate it.
- Choose menu "Billsonar/References..." and set the format of document ordinal numbers.
- Setting of currencies and their formatting.
- Naming custom fields.
- Restart software.
- Set settings: VAT percentages, quantity unit, etc.
- Adding clients and products.
- Create new document templates, or modify the already existing ones.
- The software will ask for the starting ordinal number of document at the first save. While making an invoice, it will ask at finalizing.
After purchase:
- If you were creating finalized invoices, you can continue your work in the used company.
- If you were only trying out the software with non-valid data and would like to start over, create a new company/database and registrate it. This way, you can start real invoicing with a new empty database.