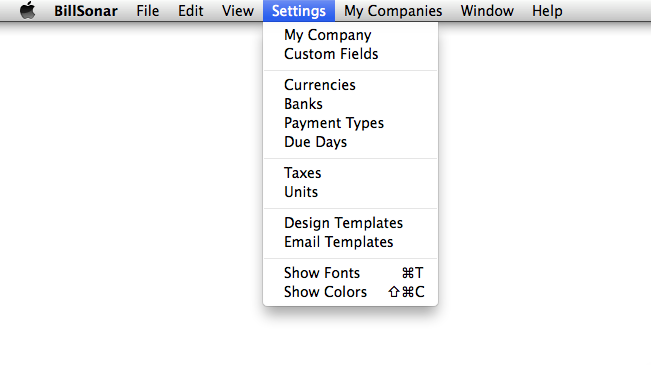
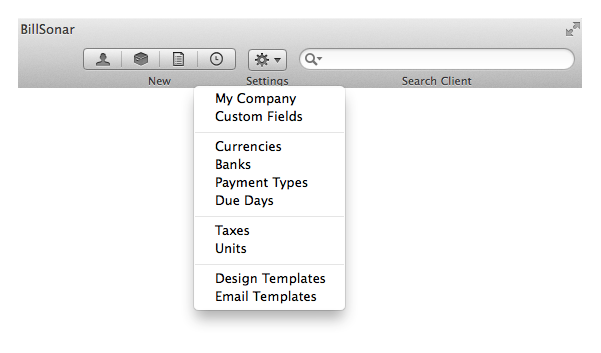
There are many opportunities for the customization of BillSonar, these can either be reached from the
"Settings" menus on the top, or from the  "Settings" on the toolbar.
While maintenancing master data, the following functions can be used.
- Adding new:
button or ⌘N.
- Editing:
/Edit or ⌘E.
- Duplicating:
/Duplicate or ⌘D.
- Deleting: "-" button or ⌦.
My company /Company data
Before filling out the first document, give in the basic data of your company.
In the expanding menu "Customize" on toolbar, edit fields belonging to company data can be hidden or shown.
In fields address and description, you can use button "Enter", this way you can type in data in more lines,
formed by your need, in the way you want them to appear later.
Custom fields
Beside the already existent ones, additional features can be assigned to clients, products and own company
data. For every type, 10 custom panels can be assigned (in case of products, it can be 5 descriptional
and 5 pricetype panel). First click in the top row for selectin the type, then you can edit each line's
name by clicking on them.
Custom panels can be switched shown/hidden on datasheets.
After changing the names of custom fields, close and restart the software for it to refresh settings.
Currencies
The software will automatically show all currencies the operation system handles.
Every data can be changed, except for the built-in 3 letter identifier codes.
You can specify what kind of symbol and where to appear next to the foreign exchange amount. You can set
the character of thousand separator and decimal point, the rounding accuracy of decimals, and also the usage
of fix decimals. Settings will immediately appear in the example found at the end of every line.
You can choose which currencies you would like to use while making a document by checking in their boxes,
this way only the marked ones will be shown at that time. Naturally, this can be modified even during filling
out the document.
Easier selection is helped by the tracer in the upper-right corner, with which you can search by the code of
the foreign currency.
After changing currencies, close and restart the software for it to refresh settings.
Banks
You can assign an unlimited number of bankaccount numbers to your company, from which you can choose while filling out a document. Every account number consists of 3 lines. You can type in any of them e.g.: banks' name, address, SWIFT code, etc. at will. Also, these lines can be located separately in Design Editor.
Payment types
You can assign an unlimited number of payment types, from which you can choose while filling out a document.
Due days
Here you can set the due days you would like to use. You can name them optionally, to which you can assign the number of days, and also if it is regarding calendar- or workdays. Upon setting it to workdays, software will not consider weekends (Saturday, Sunday) while calculating due dates.
Taxes
Optional number of taxes can be fixed; to certain taxes percentages, name and % can be assigned.
Adding new taxes % can be done by pressing "+", while you can delete by pressing "-".
If you click on the  button, the selected line will be editable
or duplicatable.
Units
An optional number of quantity units can be assigned.
Design templates
An optional number of document- and report templates can be assigned, which will be editable later in
Design Editor. Pressing button "+" will offer the template types available for assigning. From here you
can choose which featured document or riport you would like to make. The name of template can freely be
changed anityme.
From every type, a default one can be selected, which will be automatically be offered by the software.
An element set as default can not be deleted. This is also true to elements already been assigned to
finished documents.
For creating new document template, first record here the name of the type of it, then you can immediately start editing it's image by switching to menu Design Editor.
Email templates
Several email templates can be created, which later can be sent directly to your client through client- or
document datasheet. These can be used on the purpose of e.g.: payment reminder, document covering letter,
charge account balance notification, etc.
You can name the template and set the objective of the email. Also, you can attach the following formats
to the already written text:
- @ClientName: name of client
- @MyCompanyName: company's name
- @TodayDate: current date
- @TodayDateAndTime: current date and time


